Spacing For Screw Down Snow Guards on Exposed Fastener Metal Roofs
Why Proper Spacing Is Critical for Pad-Style Screw-Down Snow Guards
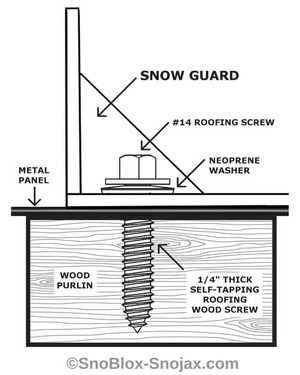
Correctly spaced pad-style screw-down snow guards ensure effective snow retention on exposed-fastener metal roofs. These guards are mechanically fastened into the structural substrate, including wood purlins, metal purlins, plywood, or OSB, using exterior-grade screws with neoprene washers. Proper snow guard spacing helps prevent dangerous snow and ice slides that can damage gutters, walkways, vehicles, and property below.
Best Practices for Installing Screw-Down Snow Guards on Metal Roofs
A reliable snow retention system uses multiple staggered rows of screw-down snow guards across the full roof surface. Avoid placing a single row at the eave—especially on long panel runs or above entryways—as this concentrates snow loads and increases the risk of failure during heavy snow events. If you're unsure how to screw snow guards to a metal roof, please read our screw down snow guard installation guide.
Fastening Guidelines for Pad-Style Screw-Down Snow Guards
- Use #14 exterior-grade screws with neoprene washers for long-term weather resistance.
- Ensure screws penetrate the structural substrate—not just the metal panel.
- Use a cordless drill with torque control to prevent overtightening and damage to the washer.
- Do not install on standing seam panels—use non-penetrating systems like SnoBar® or ColorBar instead.
- Maintain proper vertical spacing (5–25 ft) and horizontal spacing (9–12 in) per manufacturer guidelines for consistent load distribution.
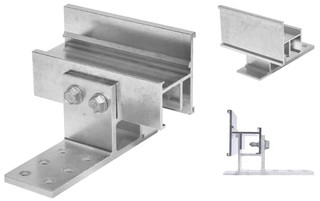
Pad-Style Snow Guards Fastened to Wood Purlins
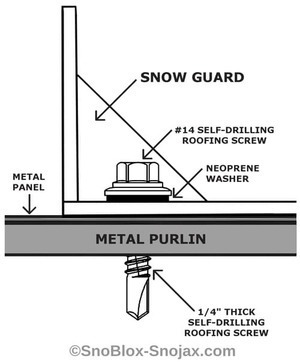
Pad-Style Snow Guards Fastened to Metal Purlins
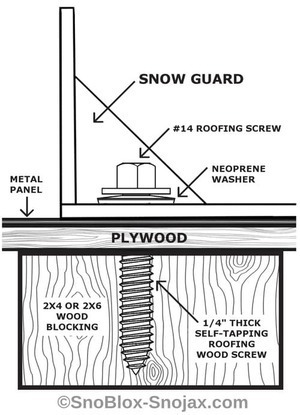
Pad-Style Snow Guards on Plywood / OSB Decks with Blocking
Installation Advice
Learn how to screw-down snow guards on exposed-fastener metal roofs. Read the complete screw-down snow guard installation guide..
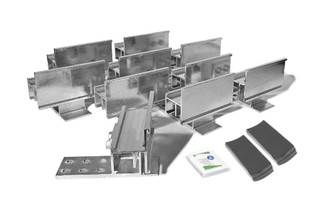
Screw-Down Snow Guard Cost Calculator for Metal Roofs
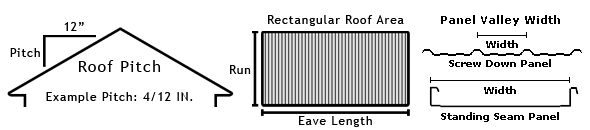
Estimate how many screw-down snow guards your metal roof will need and the total cost before reviewing the spacing charts below. This calculator uses our recommended spacing for roof pitches between 1/12 and 12/12, assuming the snow guards are installed on solid decking or anchored into purlins. Always position snow guards on the roof in a staggered arrangement.
Results
Model
Rows
Guards/Row
Total
Cost
Disclaimer
The calculator provides an estimated quantity and layout for screw-mounted snow guards, assuming typical roof conditions and a ground snow load of up to 45 PSF. Use the results for preliminary planning purposes only. Install screw-mounted snow guards over purlins or a solid surface, such as wood blocking.
The proper spacing depends on your roof. Things like panel profile, roof condition, building design, exposure, and local snow patterns all play a role. Before you start, check with the manufacturer to confirm the spacing for your system. Don't position snow guards by themselves above doors, walkways, or small roof sections.
IceBlox, Inc. shall not be held liable for any erroneous calculations, misinterpretations, or outcomes resulting from misuse of the calculator, reliance on its output, or the entry of incorrect, incomplete, or assumed data. Use the results for preliminary planning purposes only.
For system-engineered layouts or roofs with a ground snow load above 45 PSF, request a SnoBar® / ColorBar system quote.
Recommended Snow Guard Spacing Layouts by Roof Pitch
Select Your Roof Pitch Below to See Spacing Guides
| 1/12 – 2/12 Pitch | 3/12 – 4/12 Pitch | 5/12 – 6/12 Pitch | 7/12 – 8/12 Pitch | 9/12 – 12/12 Pitch |
1/12 – 2/12 Roof Pitch

Eave Strut: Horizontal support member at the roof and wall edge
Row Placement: Install snow guards in each panel flat with a 12-inch vertical offset.
Pitch: 1/12 to 2/12
Frequency: Every 25 ft up the roof
Snow load: Up to 45 PSF
Back to Top
3/12 – 4/12 Roof Pitch
Eave Strut: Horizontal support member at the roof and wall edge
Row Placement: Install snow guards in each panel flat with a 12-inch vertical offset.
Pitch: 3/12 to 4/12
Frequency: Every 20 ft up the roof
Snow load: Up to 45 PSF
Back to Top
5/12 – 6/12 Roof Pitch

Eave Strut: Horizontal support member at the roof and wall edge
Row Placement: Install snow guards in each panel flat with a 6-inch vertical offset.
Pitch: 5/12 to 6/12
Frequency: Every 10 ft up the roof
Snow load: Up to 45 PSF
Back to Top
7/12 – 8/12 Roof Pitch
Eave Strut: Horizontal support member at the roof and wall edge
Row Placement: Install snow guards in each panel flat with a 6-inch vertical offset.
Pitch: 7/12 to 8/12
Frequency: Every 6 ft up the roof
Snow load: Up to 45 PSF
Back to Top
9/12 – 12/12 Roof Pitch
Eave Strut: Horizontal support member at the roof and wall edge
Row Placement: Install snow guards in each panel flat with a 6-inch vertical offset.
Pitch: 9/12 to 12/12
Frequency: Every 5 ft up the roof
Snow load: Up to 45 PSF
Back to Top
Disclaimer
This page may be used only for developing plans and specifications for projects using IceBlox Inc. products. IceBlox Inc. (d.b.a SnoBlox-Snojax) is not responsible for misuse of this page or snowguardspacingtool.com. The user assumes all risks. IceBlox Inc. shall not be held liable for incorrect material quantities recommended.
Additional Installation Notes
- Install snow retention on upper roof sections before lower ones to prevent cascading loads.
- Use ice & water shield membranes beneath panels in heavy-snow regions.
- Inspect annually for fastener tightness and seal integrity.
- Always follow manufacturer-approved installation instructions for each guard model.
FAQs: Screw-Down Snow Guards on Metal Roofs
Each of our screw-down, polycarbonate snow guards requires two screws. You will find pre-drilled holes or starter points near each guard's face. Our SnowCatchers feature three holes, 2 of which are near the face and required for attachment. A 3rd hole, at the opposite side of the base, is primarily used as a hanging point if powder coated or you choose to paint them. This hole can also act as an additional attachment point. The SnoCleat PBR and SnoCleat 2.67 both require at least three screws but can use up to 6 per guard.
Most of our polycarbonate pad-style snow guards come with molded starter points. Our screws are self-tapping and able to drill through this material with ease. You may pre-drill the guards if you prefer, but it is not a requirement. The Snojax 1, Stainless SnowCatchers, aluminum SnoCleat PBR, and the aluminum SnoCleat 2.67 come with predilled holes.
Most of our screw-down snow guards can attach with the two different screws that we have available currently. The Master Gripper is a 2" long #14 self-tapping screw for use with wood purlins, whereas the Master Driller is a 1.5" #14 self-tapping screw for use with metal purlins. These fasteners are case-hardened carbon steel, are silver in color, and feature neoprene washers. The SnoCleat 2.67 uses a 3" screw as it straddles the high ribs of the panel. Depending on whether or not there is insulation under the panels, longer screws may be necessary.
NovaFlex MR150's neutral curing, ability to cure in wet conditions, and low-temperature tolerance make it our sealant of choice. With our polycarbonate snow guards, we recommend applying liquid sealant liberally over the entire base, filling in any gaps between the guard and the panel. Once applied, screw the snow guards down and run a gloved finger around the guard to seal in the perimeter and remove excess from the roof surface. With our metal SnowCatchers, SnoCleat PBR, and SnoCleat 2.67, a die-cut foam gasket is included for use in place of liquid sealant. In some cases, however, our customers will still run a bead of sealant around the pads to provide additional protection. This step is optional.
An adequately installed snow guard system should result in zero roof leaks. Make sure that you are using screws with neoprene washers and pairing them with either liquid silicone (for polycarbonate snow guards) or a foam gasket (for metal snow guards). Many people elect not to make any new roof penetrations for snow guards. As such, they will install a glue-down snow retention system with the Surebond SB-190 adhesive.
Approximately 10 of our larger polycarbonate snow guards and 20–25 of our smaller ones can be installed with the Novaflex MR150 sealant and screws. Please be aware that this may change depending on the user's application. Novaflex MR150 is a sealant and not an adhesive. You shouldn't use it to glue down polycarbonate snow guards in place of Surebond SB-190.
Most exposed-fastener metal roofs require at least one staggered row of screw-down snow guards spaced 9–12 inches horizontally and 5–25 feet vertically, depending on the roof pitch. The exact spacing and number of recommended snow guards per panel flat depends on roof length, pitch, panel profile, and local snow loads.
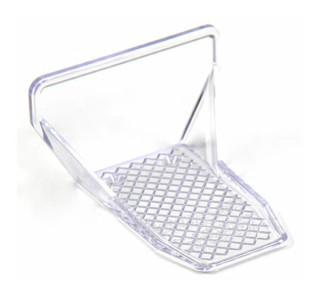
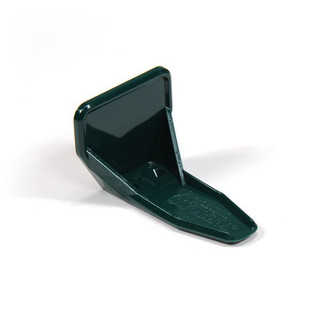
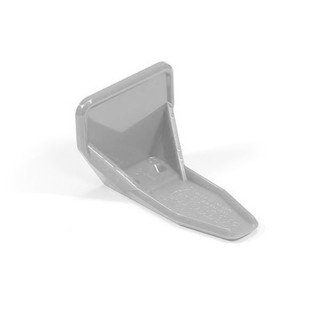
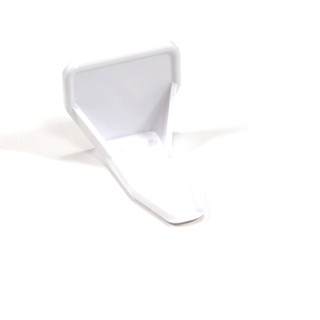
Screw-Down Clear PolyCarbonate Snow Guards


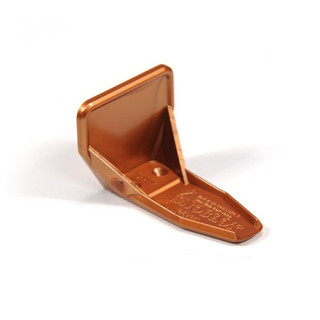
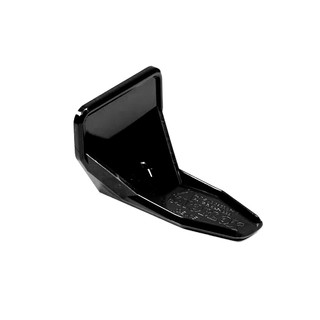
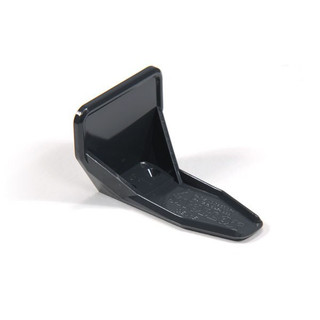
Screw-Down Polycarbonate Snow Guard Colors

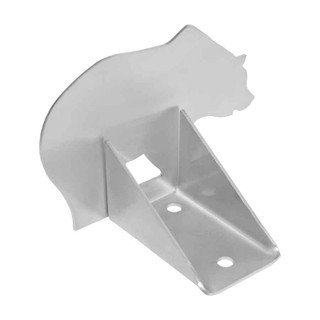
Screw Down Metal Snow Guards