Spacing For Metal Roof Glue Down Snow Guards
Adhesive-Mounted Snow Guard Placement and Spacing Guide
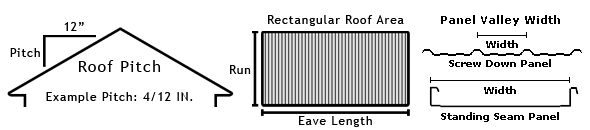
Snow and ice sliding off smooth metal roofs can create dangerous avalanche conditions during winter. Installing an adhesive-mounted snow guard system helps prevent slides by evenly distributing snow loads across the roof. Proper snow guard spacing keeps frozen precipitation in place instead of sliding and damaging gutters, landscaping, or property below.
A single row of guards at the eave rarely provides enough protection. For the best results, use a staggered layout that covers the full roof area. Avoid placing guards only above doors, vents, or small roof sections—isolating guards causes uneven weight distribution and increases failure risk. Use our Adhesive Snow Guard Cost Calculator below or select your roof pitch below for general spacing guidelines.
Install snow retention on all upper roofs before adding guards to lower sections. These charts apply to ground snow loads up to 45 PSF. For higher loads, request a custom layout for a SnoBar® or ColorBar system. Compatible glue-down pad-style snow guards are listed below.
Adhesive Snow Guard Cost Calculator
Results
Model
Rows
Per Row
Total
Cost
Enter roof dimensions to generate layout preview.
Disclaimer
The calculator estimates the quantity and layout of adhesive-mounted snow guards based on typical roof conditions, up to a 45 PSF ground snow load. Results are based on a 9-12-inch horizontal staggered row spacing and may need recalculation if a panel does not support this spacing. Never exceed 16 inches of horizontal spacing between the staggered up-and-down pattern of snow guards. Use the results for preliminary planning purposes only.
Actual requirements may vary depending on panel profile, roof condition, building design, exposure, and regional snow patterns. Always verify spacing recommendations with the manufacturer before installation. Do not isolate snow guards above doors, walkways, or small roof sections.
IceBlox, Inc. shall not be held liable for any erroneous calculations, misinterpretations, or outcomes resulting from misuse of the calculator, reliance on its output, or the entry of incorrect, incomplete, or assumed data.
For engineered layouts or roofs above 45 PSF ground snow load, request a SnoBar® / ColorBar system quote
| 1/12 – 2/12 Pitch | 3/12 – 4/12 Pitch | 5/12 – 6/12 Pitch | 7/12 – 12/12 Pitch |
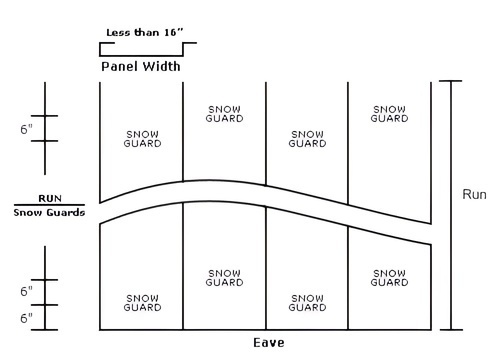
Adhesive Mounted Snow Guard Spacing Guide — 1/12 to 2/12 Pitch (≤16" Panels)

Panel: Valley width ≤ 16″.
Layout: 1 guard per flat, staggered 12″ apart.
Vertical spacing: Every 15′ upslope.
Snow load: ≤45 PSF.
Starting at 1 and 2 feet from the bottom edge, place a snow guard in the center of each valley, in a staggered pattern, across the entire roof area. Go up the roof 14 and 15 feet and repeat the staggered pattern of guards using the same staggered pattern as below. Do not exceed 15 feet vertically between rows of guards. For Example: if your roof sheets are 30 feet long, your roof would require a row at 1 and 2 feet from the bottom and at 14 and 15 feet up from the bottom. All upper roof areas must have snow retention installed before installing snow guards on a lower roof. When possible, always attempt to divide the roof areas into equal sections, with equal distance between rows, without exceeding the manufacturer's maximum placement guidelines. For panels wider than 16", please scroll down to see the next drawing below. Never isolate areas of snow guards such as just over doorways or vent pipes.
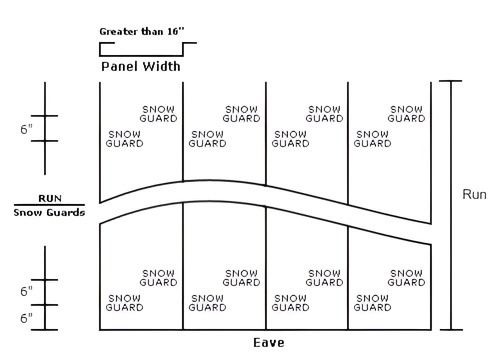
Adhesive Mounted Snow Guard Spacing — 1/12 to 2/12 Pitch (≥17" Panels)

Panel: Valley width 17–24″.
Layout: 2 guards per flat, staggered 12″ apart.
Vertical spacing: Every 15′ upslope.
Snow load: ≤45 PSF.
Starting at 1 and 2 feet from the bottom edge, place 2 snow guards equally spaced apart in the valley, in a staggered pattern, across the entire roof area. Go up the roof 14 and 15 feet and repeat the staggered pattern of guards using the same staggered pattern as below. Do not exceed 15 feet vertically between rows of guards. For Example: if your roof sheets are 30 feet long, your roof would require a row at 1 and 2 feet from the bottom and at 14 and 15 feet up from the bottom. All upper roof areas must have snow retention installed before installing snow guards on a lower roof. When possible, always attempt to divide the roof areas into equal sections, with equal distance between rows, without exceeding the manufacturer's maximum placement guidelines. Never isolate areas of snow guards such as just over doorways or vent pipes.
Adhesive Mounted Snow Guard Spacing — 3/12 to 4/12 Pitch (≤16" Panels)
Panel: Valley width ≤ 16″.
Layout: 1 guard per flat, staggered 12″ apart.
Vertical spacing: Every 10′.
Snow load: ≤45 PSF.
Starting at 1 and 2 feet from the bottom edge, place a snow guard in the center of each valley, in a staggered pattern, across the entire roof area. Go up the roof 9 and 10 feet and repeat the staggered pattern of guards using the same staggered pattern as below. Do not exceed 10 feet vertically between rows of guards. For Example: if your roof sheets are 20 feet long, your roof would require a row at 1 and 2 feet from the bottom and at 9 and 10 feet up from the bottom. All upper roof areas must have snow retention installed before installing snow guards on a lower roof. When possible, always attempt to divide the roof areas into equal sections, with equal distance between rows, without exceeding the manufacturer's maximum placement guidelines. For panels wider than 16", please scroll down to see the next drawing below. Never isolate areas of snow guards such as just over doorways or vent pipes.
Adhesive Mounted Snow Guard Spacing — 3/12 to 4/12 Pitch (≥17" Panels)
Panel: 17–24″ width.
Layout: 2 guards per flat, staggered 12″ apart.
Vertical spacing: Every 10′.
Snow load: ≤45 PSF.
Starting at 1 and 2 feet from the bottom edge, place 2 snow guards equally spaced apart in the valley, in a staggered pattern, across the entire roof area. Go up the roof 9 and 10 feet and repeat the staggered pattern of guards using the same staggered pattern as below. Do not exceed 10 feet vertically between rows of guards. For Example: if your roof sheets are 20 feet long, your roof would require a row at 1 and 2 feet from the bottom and at 9 and 10 feet up from the bottom. All upper roof areas must have snow retention installed before installing snow guards on a lower roof. When possible, always attempt to divide the roof areas into equal sections, with equal distance between rows, without exceeding the manufacturer's maximum placement guidelines. Never isolate areas of snow guards such as just over doorways or vent pipes.
Adhesive Mounted Snow Guard Spacing — 5/12 to 6/12 Pitch (≤16" Panels)
Panel: ≤ 16″ width.
Layout: 1 guard per flat, staggered 6″ apart.
Vertical spacing: Every 8′.
Snow load: ≤45 PSF.
Starting at 6 inches and 1 foot from the bottom edge, place a snow guard in the center of each valley, in a staggered pattern, across the entire roof area. Go up the roof 7 and 8 feet and repeat the staggered pattern of guards using the same staggered pattern as below. Do not exceed 8 feet vertically between rows of guards. For Example: if your roof sheets are 16 feet long, your roof would require a row at 6 inches and 1 foot from the bottom and at 7 and 8 feet up from the bottom. All upper roof areas must have snow retention installed before installing snow guards on a lower roof. When possible, always attempt to divide the roof areas into equal sections, with equal distance between rows, without exceeding the manufacturer's maximum placement guidelines. For panels wider than 16", please scroll down to see the next drawing below. Never isolate areas of snow guards such as just over doorways or vent pipes.
Adhesive Mounted Snow Guard Spacing — 5/12 to 6/12 Pitch (≥17" Panels)
Panel: 17–24″ width.
Layout: 2 guards per flat, staggered 6″ apart.
Vertical spacing: Every 8′.
Snow load: ≤45 PSF.
Starting at 6 inches and 1 foot from the bottom edge, place 2 snow guards equally spaced apart in the valley, in a staggered pattern, across the entire roof area. Go up the roof 7'6" and 8 feet and repeat the staggered pattern of guards using the same staggered pattern as below. Do not exceed 8 feet vertically between rows of guards. For Example: if your roof sheets are 16 feet long, your roof would need a row at 6 inches and 1 foot from the bottom and at 7'6" and 8 feet up from the bottom. All upper roof areas must have snow retention installed before installing snow guards on a lower roof. When possible, always attempt to divide the roof areas into equal sections, with equal distance between rows, without exceeding the manufacturer's maximum placement guidelines. Never isolate areas of snow guards such as just over doorways or vent pipes. Never isolate areas of snow guards such as just over doorways or vent pipes.
Adhesive Mounted Snow Guard Spacing — 7/12 to 12/12 Pitch (≤16" Panels)
Panel: ≤ 16″ width.
Layout: 1 guard per flat, staggered 6″ apart.
Vertical spacing: Every 5′.
Snow load: ≤45 PSF.
Starting at 6 inches and 1 foot from the bottom edge, place a snow guard in the center of each valley, in a staggered pattern, across the entire roof area. Go up the roof 4'6" and 5' and repeat the staggered pattern of guards using the same staggered pattern as below. Do not exceed 5 feet vertically between rows of guards. For Example: if your roof sheets are 10 feet long, your roof would require a row at 6 inches and 1 foot from the bottom and at 4'6" and 5' up from the bottom. All upper roof areas must have snow retention installed before installing snow guards on a lower roof. When possible, always attempt to divide the roof areas into equal sections, with equal distance between rows, without exceeding the manufacturer's maximum placement guidelines. For panels wider than 16", please scroll down to see the next drawing below. Never isolate areas of snow guards such as just over doorways or vent pipes.
Adhesive Mounted Snow Guard Spacing — 7/12 to 12/12 Pitch (≥17" Panels)
Panel: 17–24″ width.
Layout: 2 guards per flat, staggered 6″ apart.
Vertical spacing: Every 5′.
Snow load: ≤45 PSF.
Starting at 6 inches and 1 foot from the bottom edge, place 2 snow guards equally spaced apart in the valley, in a staggered pattern, across the entire roof area. Go up the roof 4'6" and 5' and repeat the staggered pattern of guards using the same staggered pattern as below. Do not exceed 5 feet vertically between rows of guards. For Example: if your roof sheets are 10 feet long, your roof would require a row at 6 inches and 1 foot from the bottom and at 4'6" and 5 feet up from the bottom. All upper roof areas must have snow retention installed before installing snow guards on a lower roof. When possible, always attempt to divide the roof areas into equal sections, with equal distance between rows, without exceeding the manufacturer's maximum placement guidelines. Never isolate areas of snow guards such as just over doorways or vent pipes.
Disclaimer
This page may be used only for the purpose of developing plans, specifications and/or approval drawings for construction projects utilizing only IceBlox, Inc. manufactured or distributed products and components. It is to be used only as a quick reference for estimating snow guard quantities and placement on roofs with less than 45 PSF ground snow load.
IceBlox Inc., d.b.a SnoBlox-Snojax, referred to hereafter as IceBlox, Inc., or any subsidiary brands or companies, is not responsible for estimates or purchases resulting from the erroneous or improper use of this page or snowguardspacingtool.com.
The user shall determine the suitability of the product for its intended use and assumes all risks of its use or handling. In regards to spacing guidelines, quotations and or layouts, Iceblox, Inc. will not be held liable for incorrect material quantities not recommended on snowguardspacingtool.com and/or SnoBlox-Snojax.com
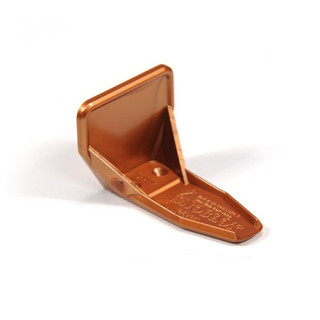
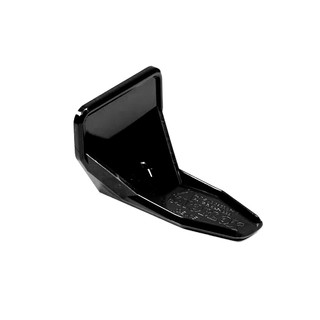
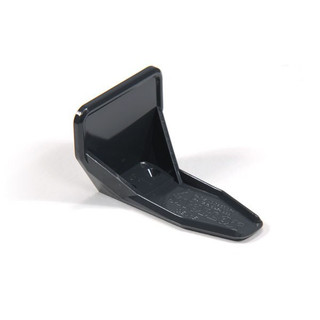
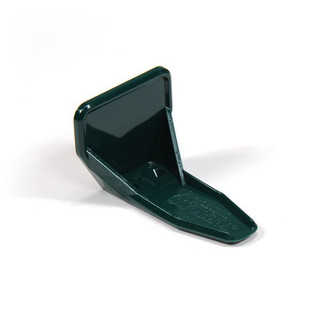
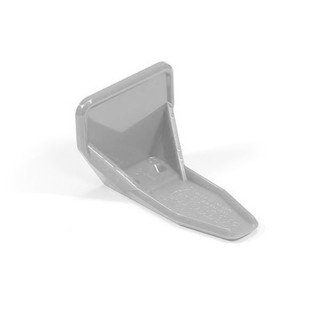
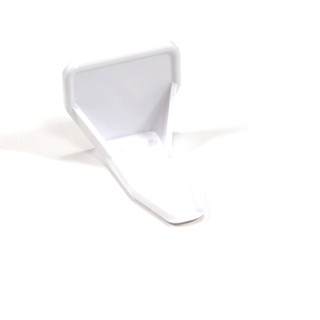
Adhesive Mounted Metal Roof Snow Guards
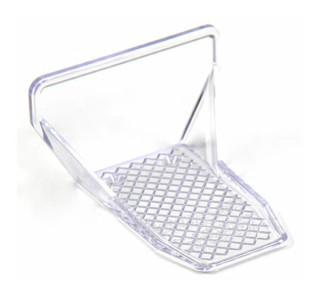


Colored Glue Down Snow Guards

Frequently Asked Questions For Spacing Glue Down Snow Guards
You can install our clear polycarbonate snow guards with adhesive, except for Snojax 1. The world's first original clear guard, the Snojax 1, can only be installed with mechanical fasteners and is not recommended for use with standing seam panels. However, all of our guards are compatible with fasteners on screw-down panels.
The only adhesive that we recommend for use with our products is Surebond SB-190. This adhesive is the industry standard for use with polycarbonate snow guards. Surebond SB-190 creates a chemical fusion bond with our guards, producing a robust and durable attachment between the snow guard and the metal roof panel.
One of the biggest reasons to install snow guards with glue rather than screws has to do with the panel type that you are attaching to. Because of its floating nature, you should never penetrate standing seam roofing with mechanical fasteners. Unlike standard r-panel or PBR style screw-down panels, which fasten directly to the structure of the roof, standing seam panels snap onto hidden clips mounted to decking underneath. This installation method allows the floating panels to expand and contract freely with temperature changes. Glue-mounted snow guards do not hinder this expansion and contraction process. Adhesive-mounted snow guards can also be an excellent choice for screw-down panels. They can save you from costly repairs in extreme conditions! Ground snow load information comes from your area's average winter snowfall; these spacing charts only go up to 45psf. Even if installers use the charts properly, there is always the chance for your roof to experience higher-than-average winter precipitation or snowpocalypse conditions. In these extreme situations, there is a potential for the snow guards to release due to overloading. Adhesive-mounted snow guards have a built-in release factor that allows the snow guards to come off the roof before causing metal panel damage or roof leaks. You can easily reinstall them and put them back in place, in the same spots, once the weather warms up with little effort.
We currently only offer the Surebond SB-190 in clear to match our clear polycarbonate snow guards. Clear Surebond SB-190 cures to a translucent finish.
To achieve a complete cure, the Surebond SB-190 adhesive for snow guards requires approximately 28 days at 50 degrees Fahrenheit. Temporary periods of temperatures less than that will stall the curing process. They can lengthen the amount of time necessary for a complete cure. Lower temperatures and rain (after 45 minutes) will not harm the adhesive during curing.
The Surebond SB-190 adhesive can attach approximately 10 of our larger polycarbonate snow guards and 20-25 of our smaller models. Please keep in mind that this can vary based on the application.
Adhesive mounting a snow guard is the least detrimental attachment option for snow retention on your metal roof. In extreme winter conditions, above and beyond the designed layout, they will usually release from the roof rather than cause panel damage or roof leaks. You can easily reinstall them in the same spot on the roof. Clean the panel with soap and water, wait for it to completely dry, and reapply the guard with the SureBond SB-190 adhesive. Customers love this feature because it can preserve the watertightness of their metal roof.