SnoBlox-Snojax Proudly Launches New Updated Version of The Snow Guard Spacing Tool!
Posted by Derek Gamble - SnoBlox-Snojax Specialist on Nov 27th 2023
The return of SpacingTool.com
For years our customers have relied on SpacingTool.com for instant snow guard spacing layouts. This FREE and user friendly website has allowed thousands of our customers to experiment with our different product configurations and attachment methods without needing to wait for a representative. Unfortunately, as all technology does, this trusted resource began to age. Fortunately, this opened the door for us to breathe new life into it and that is what we have launched today! SpacingTool.com is now available for use on desktop, tablet, and mobile devices! Let’s run a test layout together, so you can see how easy it is to use this incredible innovation in snow guard spacing layouts.
(Note that if your Ground Snow Load is higher than 45psf, you will not be able to use individual or pad style snow guards and must instead use a snow rail system. If this is the case, you can click on the “Request a Quote” button in the bottom right of the screen, which will lead you to our Bar Quote Request Form. Just fill out the form and our bar specialist will have a quote back to you within 24-48 hours.)
Easy to follow steps
Each step of the Spacing Tool Snow Guard Calculator will feature a short video explanation by our National Sales Manager, Howie Scarboro for quick reference during this process. To begin, click on “Get Started”. This will take you to our Terms of Sale Page. Once you click the check box and agree to the terms, you can click continue, which will allow you to enter the tool.
Panel Profile
In this step, you
will select the roof panel type that most closely matches your project. Options include 3 of the most popular roofing types:
“R”-Panel, “U”-Panel, and Standing Seam Metal Roofing. Each option shows a
profile of the panel shape and gives a brief description of that
panel’s details. Click the checkbox next to your selection and then click continue. I selected
an “R” Panel for this example.
SpacingTool.com Main Page Screen Capture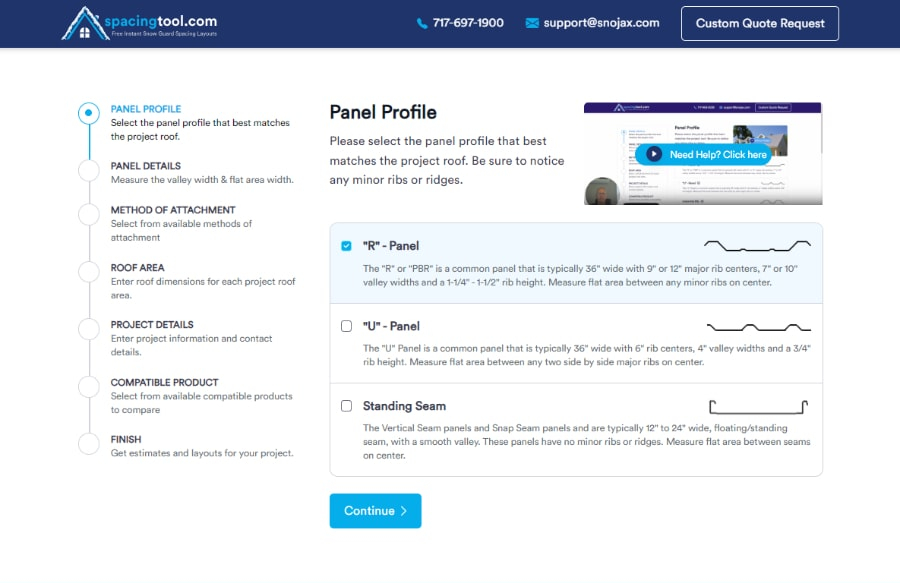
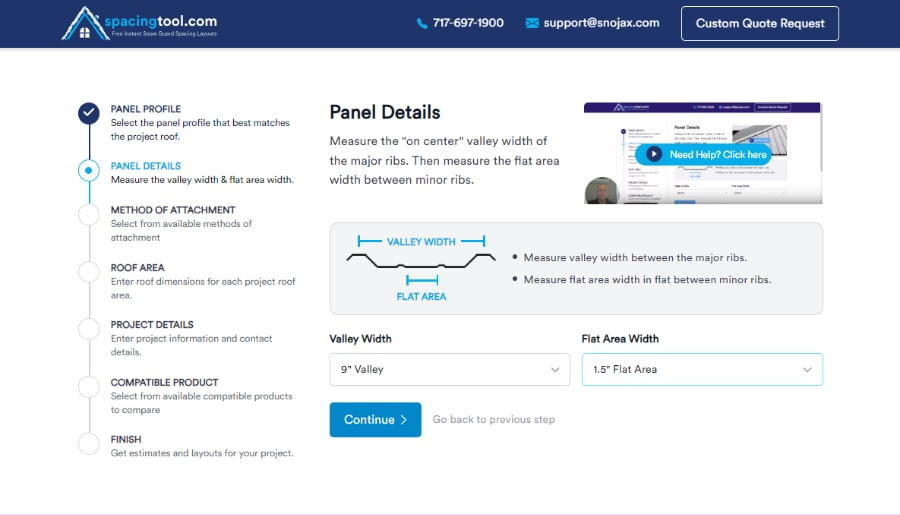
Panel Details
In this step, you
will select the valley width and the flat area width of your panel.
Valley Width refers to the distance between the major ribs or seams
of a panel when measured from center to center. Flat Area Width refers to the flat region of the panel where the guard will be
mounted. On our “R”-Panel in this example, that is the area
between the smaller “minor ribs”. I chose a 9” Valley Width and
a 1.5” Flat Area Width for our example. After selecting yours,
click continue to move onto the next step.
Method of Attachment
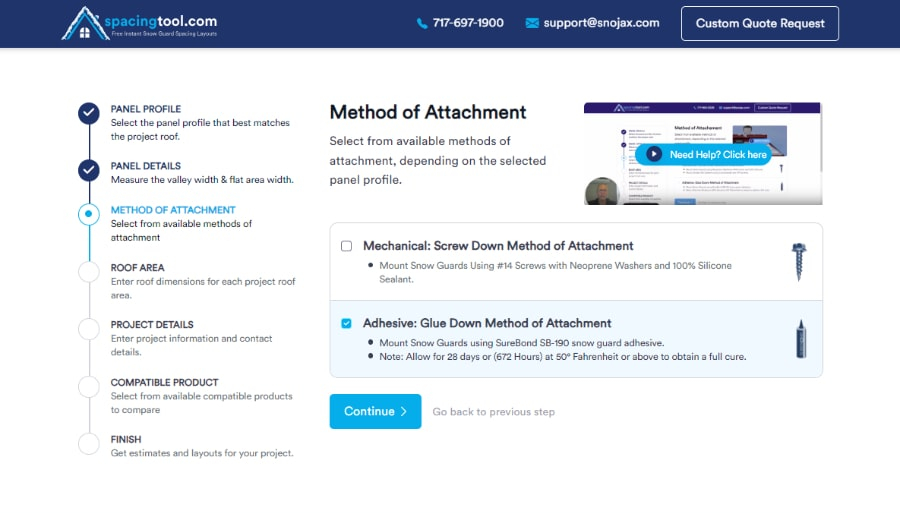
In this step, you
will select the attachment method which you are using to mount
your snow guards. You will see options for a
screw down or glue down attachment method. Please note that selecting a standing seam panel will not allow a screw down method of attachment, as this is never
recommended. As we have chosen an “R”-Panel, though, we are able
to select either choice. Also keep in mind, when making this choice,
that the
Surebond SB-190 Adhesive requires approximately 28 days at
50 degrees Fahrenheit or above to achieve a full cure. I chose
Adhesive for our example. Make your selection and click continue.
Roof Area
In this step you
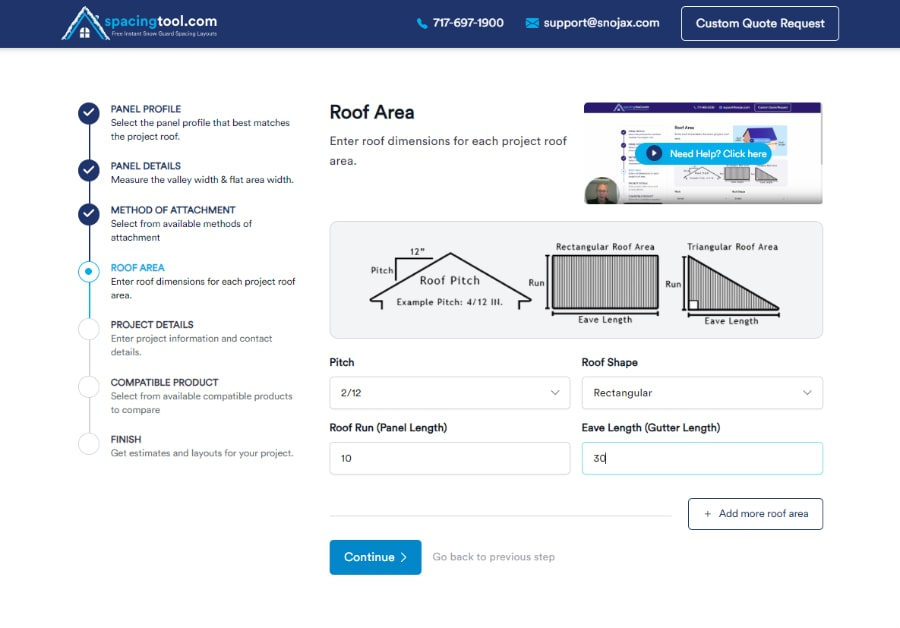
will enter your roof areas individually so that SpacingTool can take these areas into account. It is common for a project with
multiple roof slopes, gables, and dormers to have multiple layout
requirements due to differences in pitches. As an example, a standard 2
sided gable roof, would have 2 roof areas if you were looking to install snow guards on both sides. Please note, that we never recommend isolated placement such as just over doorways, walkways, chimneys, etc. In order for any snow
retention system to work properly, you need it to span the entire
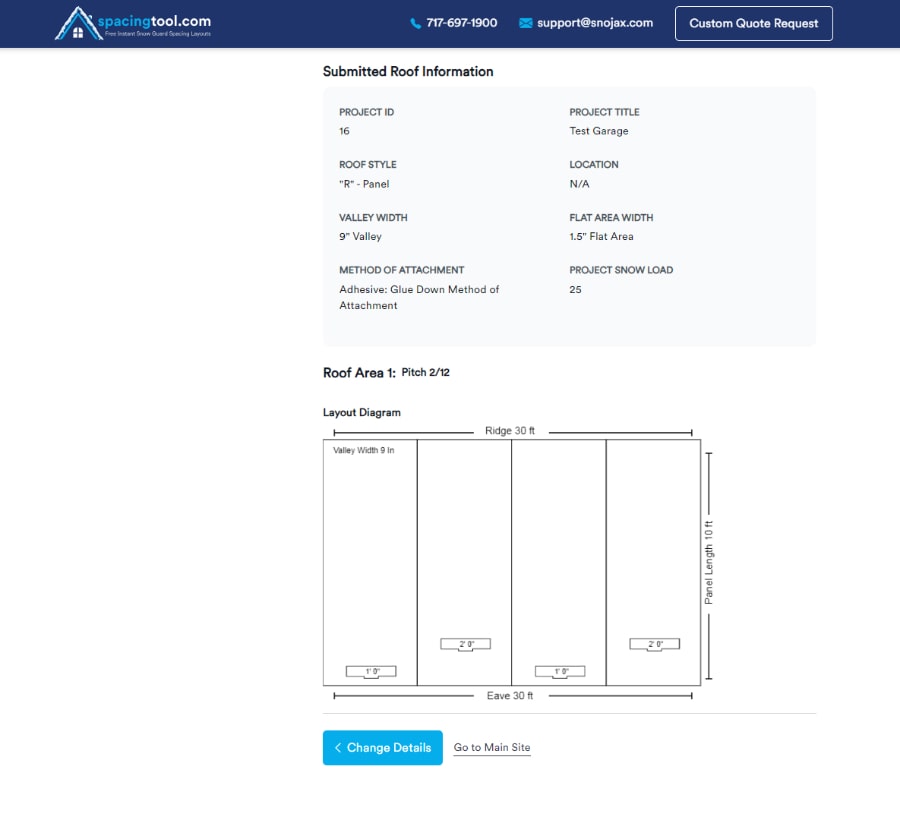
length of the roof area. For this example, I entered a single slope rectangular roof area with a 2:12 pitch, 10’ Roof Run, and a 30’ Eave
Length. Please see the diagrams on this page for clarity on this terminology. You can enter as many roof areas as are necessary to complete
your project. Once you are finished, click continue.
Project Details
In this step you
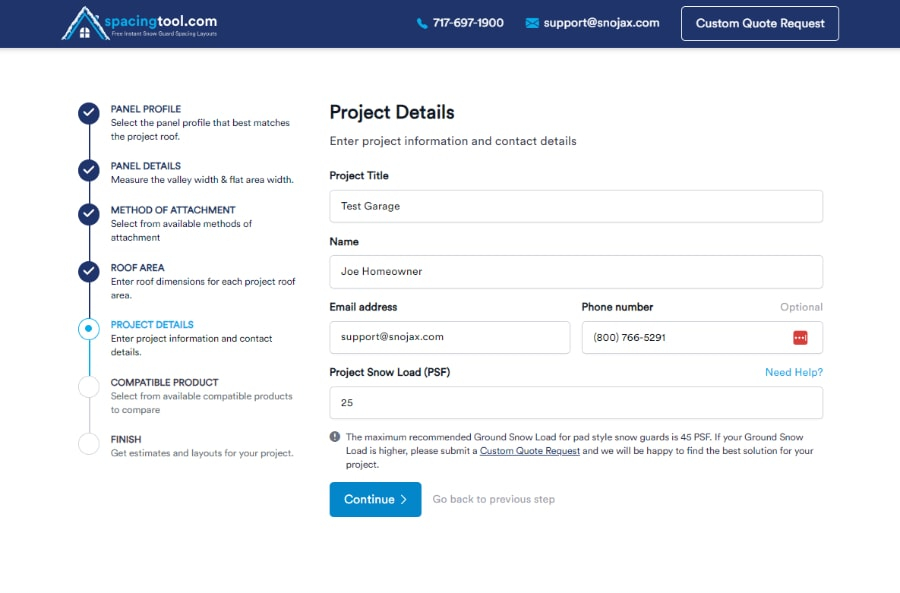
will fill out a brief form with information about your project, such
as the project name, snow load, and your contact information. This
info helps us know a bit more about the project and also will be input onto your printable results page. Snow load is extremely important when
calculating a proper layout for your project. As stated at the
beginning of this blog, this tool will not work for projects with
ground snow loads of above 45psf. For our example, I entered 25psf
which is a common snow load in southern Pennsylvania. A quick web
search should normally be able to produce this number for you. You
can also typically find this information on your building plans, or
by calling a local building inspector. Click continue to move on to
the final step.
Compatible Product
You’ve made it to
the final step! Now comes the fun part; picking out the
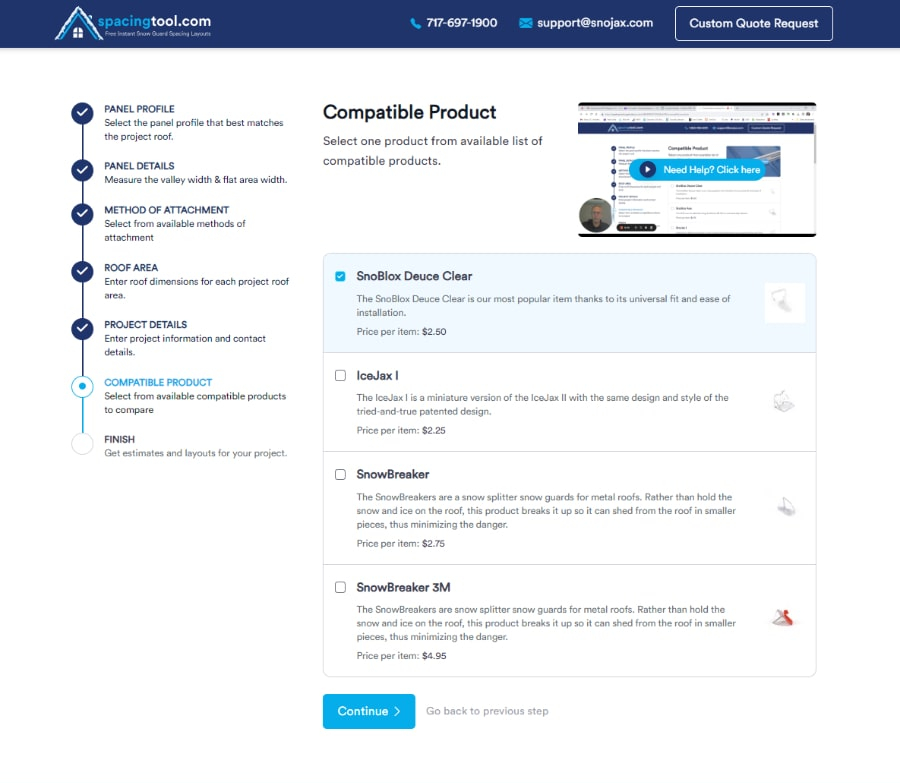
snow guard that you want. Because of the previous information that you input
into the system, only the snow guards that will work with your
project can now be selected. If you see an option from our product
lineup that isn’t listed, it is because it is not advised for the
best results. Each product in this list features its current unit
pricing, a brief description, and an image of the guard in question.
I selected the SnoBlox Deuce, which just so happens to be our most
popular model. Make your choice and continue to your results.
Finish
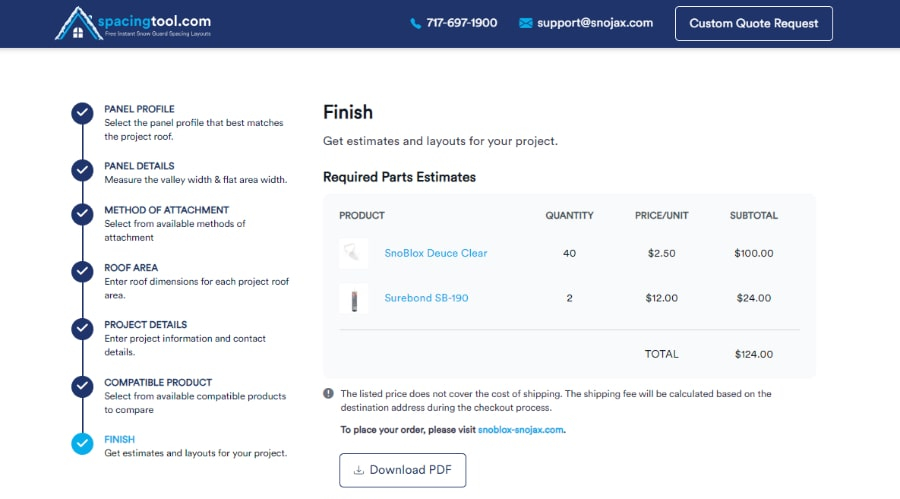
Congratulations! You have completed your Spacing Tool layout. This results page will give you a shopping list of the products that you need and their current pricing. The listed price does not include the shipping, handling, or tax and is subject to change. You can get prices for those when placing your order by phone or online at SnoBlox-Snojax.com. Simply add the items into your cart and the shipping can be calculated before you commit to the order.
If you scroll down a bit on your results page, you will find a
pictorial diagram of the recommended spacing layout for each of those
roof areas that you entered in the earlier steps. This drawing is not
to scale, but does, however, show the correct dimensions for your layout. For
our example, my roof area requires a single staggered row along the bottom edge. The
guards are staggered at 1’ and 2’ from the eave edge across the
entire length of the roof area.
So there you have it! This is the NEW and IMPROVED SpacingTool.com! Your results will also emailed to you and can be referred to by the Project ID Number if you need to call in to place an order by phone or ask questions. Re-building SpacingTool was truly a labor of love and came with its share of struggles, but you asked for it and we listened. Feel free to share feedback, as we are always looking for ways to improve the customer experience here at SnoBlox-Snojax.

