Mounting the Starlink Gen 3 Standard Dish On Your Metal Roof
Posted by Derek Gamble - SnoBlox-Snojax Specialist on Apr 3rd 2024


Have you been out after dark recently and looked up at the night sky to see a dotted line of bright white dots streaking across your field of vision? No, it's not a swarm of alien spacecraft descending; it's Starlink, and this innovation is revolutionizing how people perceive internet connectivity. But what exactly is it? Starlink is a satellite internet network managed by SpaceX, the aerospace venture spearheaded by Elon Musk. A satellite constellation (or satellite swarm) is a network of multiple artificial satellites working together to serve a common purpose. Starlink utilizes a network of low-Earth orbit satellites to deliver high-speed internet connectivity across the globe, particularly in areas that traditionally have had limited or unreliable internet access, such as rural and remote locations. Starlink aims to offer faster speeds, lower latency, and unlimited data compared to traditional satellite internet providers, though at a higher monthly cost. The service requires customers to set up a satellite dish and other equipment at their location. Starlink is available in 60 countries and used for military and government applications.

SataMount: A Revolution in Satellite Mounting
To provide mounting solutions that are strong and dependable for standing seam and screw-down metal roofing, SnoBlox-Snojax has introduced the revolutionary SataMount product line, featuring the SataMount RCT for standing seam, concealed fastener roofing and the SataMount MRM for exposed fastener, screw-down metal panels.
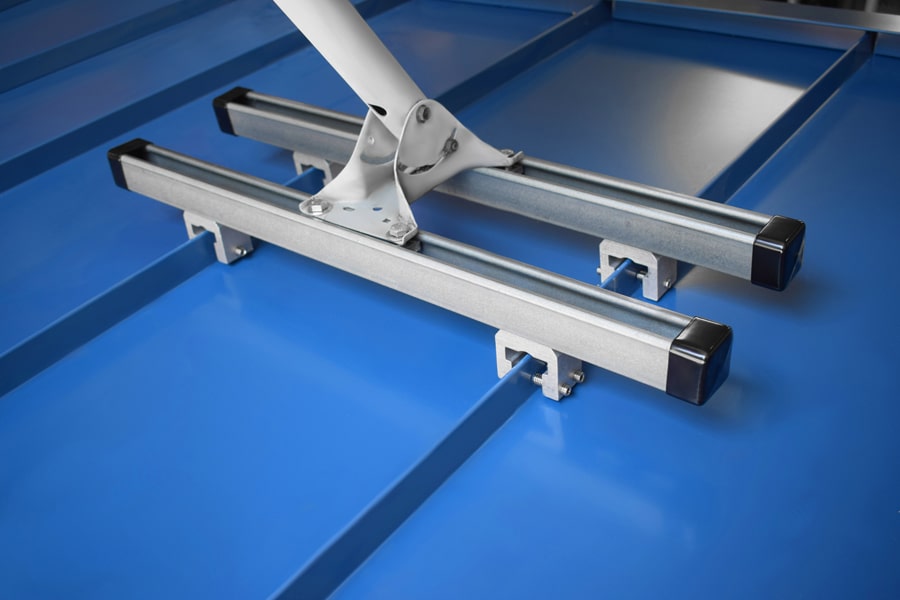
SataMount RCT
The SataMount RCT is a non-penetrating standing seam metal roof mount that allows you to securely attach a satellite dish or other equipment without drilling into the roof. It utilizes the RoofClamp RCT system to grip onto the raised seams, providing a stable mounting base. The kit includes sections of heavy-duty Unistrut bar, aluminum roof clamps, and weather-resistant hardware. It is a durable, long-lasting solution for mounting Starlink dishes, solar microinverters, and other devices on standing seam metal roofs.
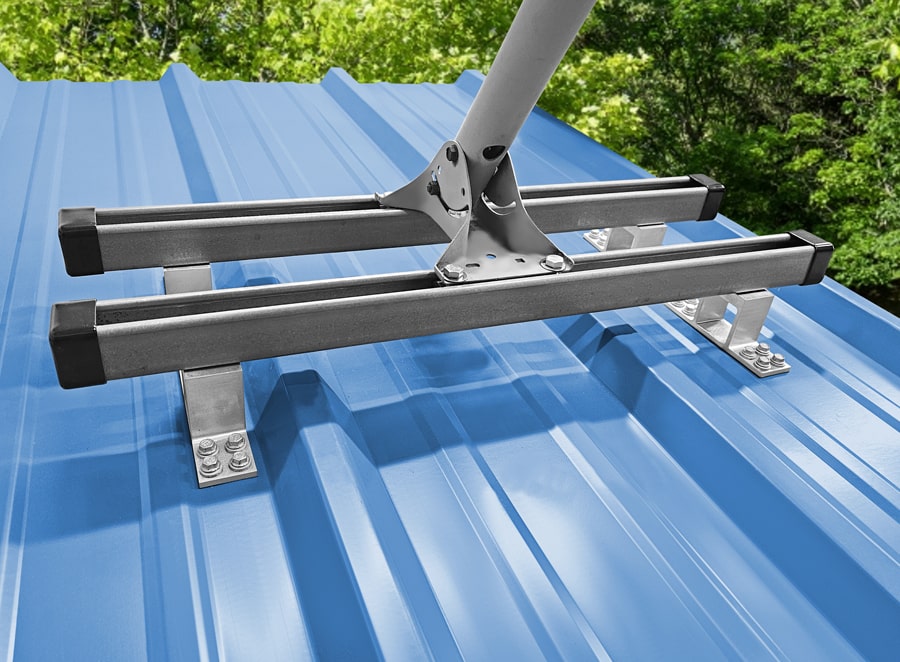
SataMount MRM
The SataMount MRM (Metal Roof Mount) is a heavy-duty, universal-fit solution for attaching satellite dishes or other equipment to a screw-down metal roof. Designed for R-Panel and AG Panel applications, the SataMount MRM features four mounting brackets that can accept up to 8 screws per bracket, allowing its use with roof substrates as thin as 1/2 inch of wood. Constructed of durable extruded aluminum, stainless steel, and galvanized components, the SataMount MRM is compatible with most satellite dishes, including Starlink Gen 1, Gen 2, and Gen 3. The SataMount can also mount conduits, solar microinverters, electrical junction boxes, and other equipment on screw-down metal roofs for residential and commercial projects.
Starlink Gen 1: The Beginning
"Starlink Gen 1" refers to the first generation of operational Starlink satellites launched by SpaceX starting in late 2019. The Starlink Gen 1 satellites have a flat-panel design with a single solar array and use Ku and Ka frequency bands for communications. They employ optical inter-satellite links, phased array beam forming technology, and a krypton-fueled Hall thruster propulsion system. The satellites are designed to avoid collisions autonomously and have 95% of their components burn up in Earth's atmosphere at the end of their lives. SpaceX initially deployed 1,584 Starlink Gen 1 satellites in 550 km orbits inclined at 53 degrees, with plans for later sub-constellations at higher and lower altitudes. The first 60 Starlink Gen 1.0 satellites launched in November 2019, with 24 additional launches planned for 2020 to build out the initial constellation. Later iterations, Starlink Gen 1.5 and Gen 2.0 introduced additional capabilities like laser inter-satellite links and increased satellite mass compared to the original Gen 1 design.
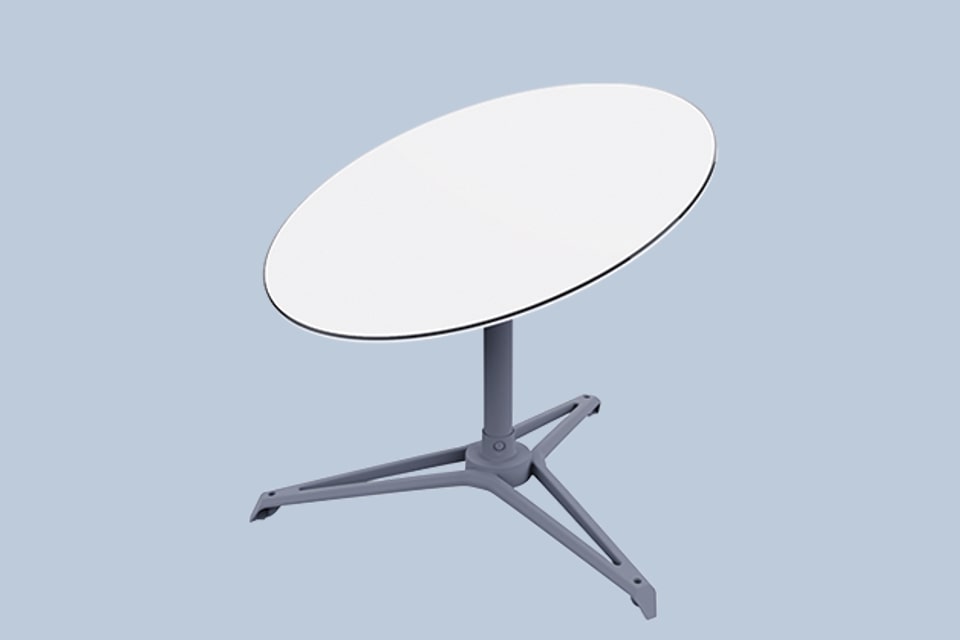
The initial version of the dish, Gen 1, has a circular design measuring 23.2 inches wide with a mast width of 1.4 inches and weighs approximately 16 pounds. It has a motor built into the satellite receiver that automatically points it toward Starlink satellites, ensuring the best possible signal. Unlike its successor, Gen 2, it has an Ethernet port. Functioning as the inaugural operational iteration of Starlink satellites, Gen 1 has undergone enhancements to minimize its visibility and impact on astronomy. The Gen 1 dish operates within a temperature range of 32–86°F, and the Gen 1 dish accommodates up to 2 users simultaneously and features a fixed, non-replaceable cable. The Gen 1 dish has proven dependable for many customers, offering download speeds averaging between 70-200 Mbps. Nonetheless, there have been reports of the Gen 2 dish occasionally delivering marginally higher speeds. Network stability has markedly improved over time, irrespective of dish generation.
Installing Starlink Gen 1 on Your Roof
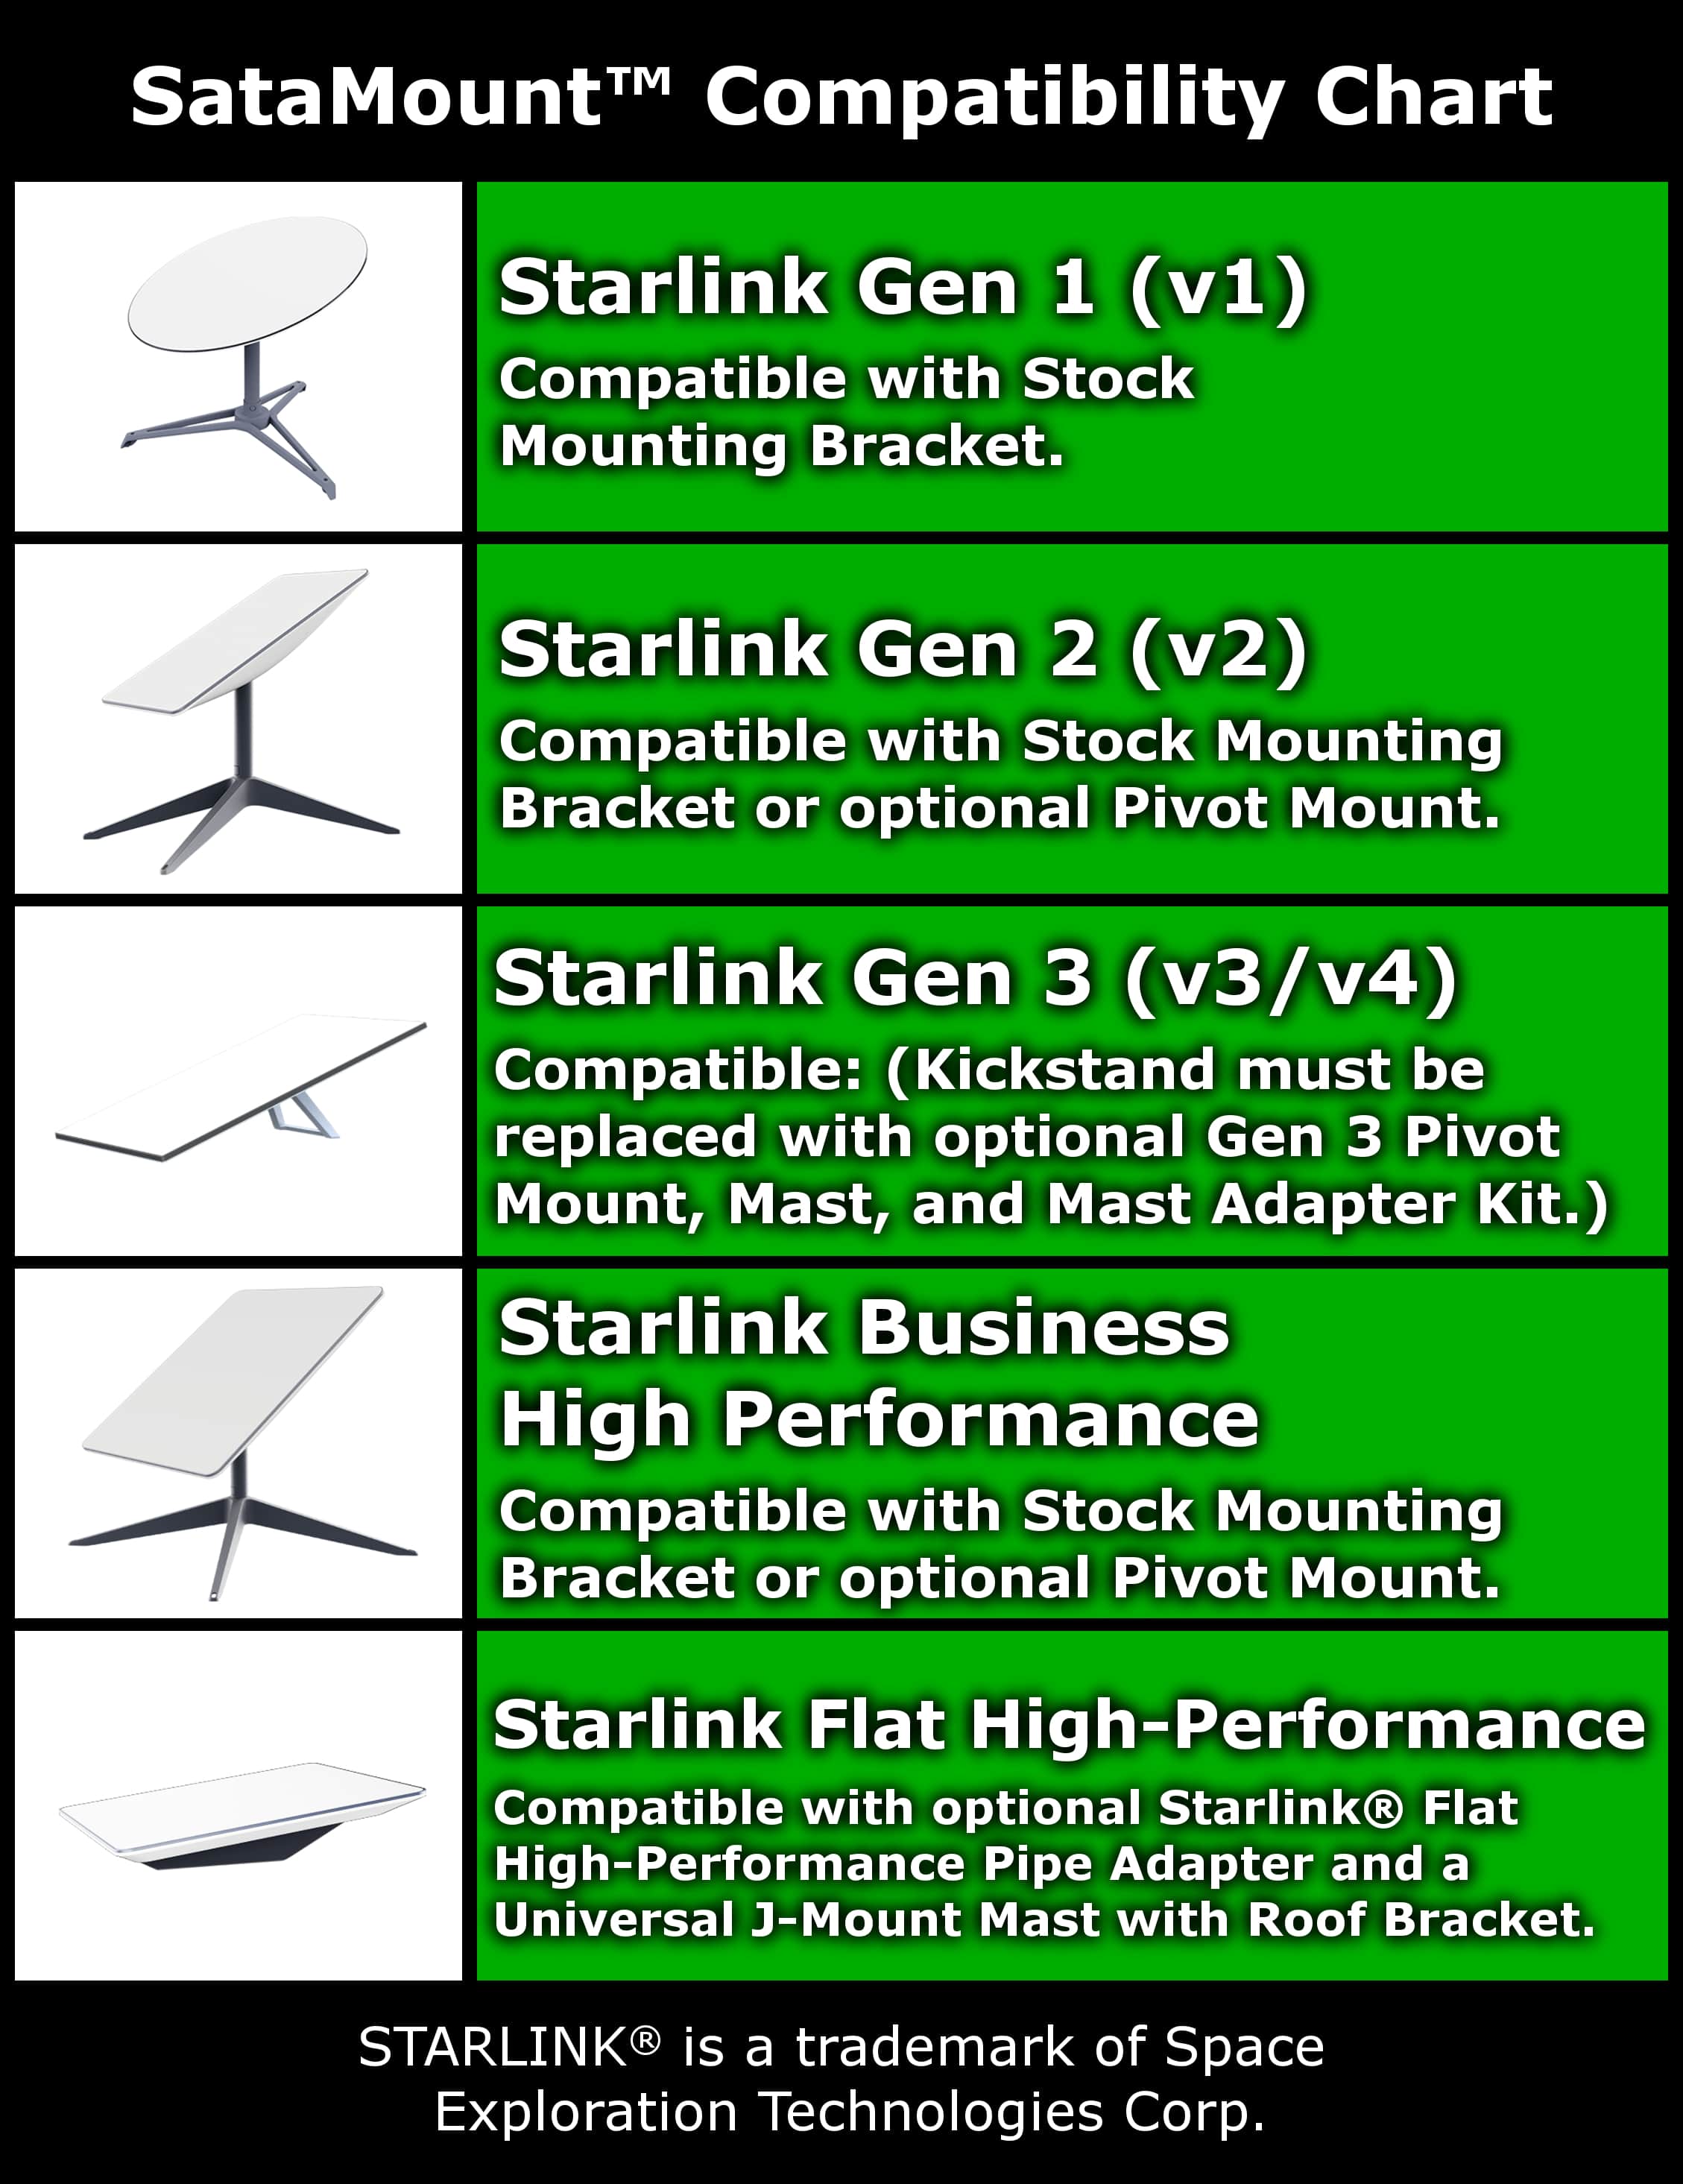
The first step in installing Starlink Gen 1 on your roof is to determine the type of roof panel you have. Do you have standing seam roofing or an exposed fastener screw-down roof? Knowing your roof type is very important. If you have a screw-down panel with exposed, visible fasteners, you will want to order the SataMount MRM mounting kit. If you have a standing seam roof with concealed fasteners, you will want to order the SataMount RCT mounting kit. The Starlink Gen 1 original bracket is directly compatible with both models. This self-aligning, motorized dish will automatically adjust if it has an unobstructed northern view of the sky. Because the stock mounting bracket is a tripod with three feet, one mounting point will be attached to the upper strut. In contrast, the remaining two attachment points attach to the lower strut.
Starlink Gen 2: Larger and More Capable
After Gen 1, the Gen 2 dish introduced further refinements in design and capabilities in 2021. The Starlink Gen 2 satellites are the second generation of satellites in SpaceX's Starlink broadband internet constellation. The Gen 2 satellites are larger and more capable than the first-generation Starlink Gen 1 satellites, with each Gen 2 satellite around 7 meters long and weighing 1.25 tons, compared to the 0.26-ton Gen 1 satellite. The Gen 2 satellites include several vital upgrades, such as more powerful phased array antennas, the use of E-band for backhaul to nearly quadruple Starlink's data capacity, and more powerful Argon Hall thrusters. SpaceX planned to launch the full-size Starlink Gen 2 satellites on its Starship rocket once it became operational. In the meantime, SpaceX deployed a "Gen 2 Mini" version that is smaller than the full-sized Gen 2 but still significantly larger than the Gen 1. The Gen 2 Mini satellites were designed with features to reduce their visibility and impact on astronomy, including dielectric mirror film and low-reflectivity black paint. SpaceX rapidly deployed these Gen 2 satellites to build out the Starlink constellation.
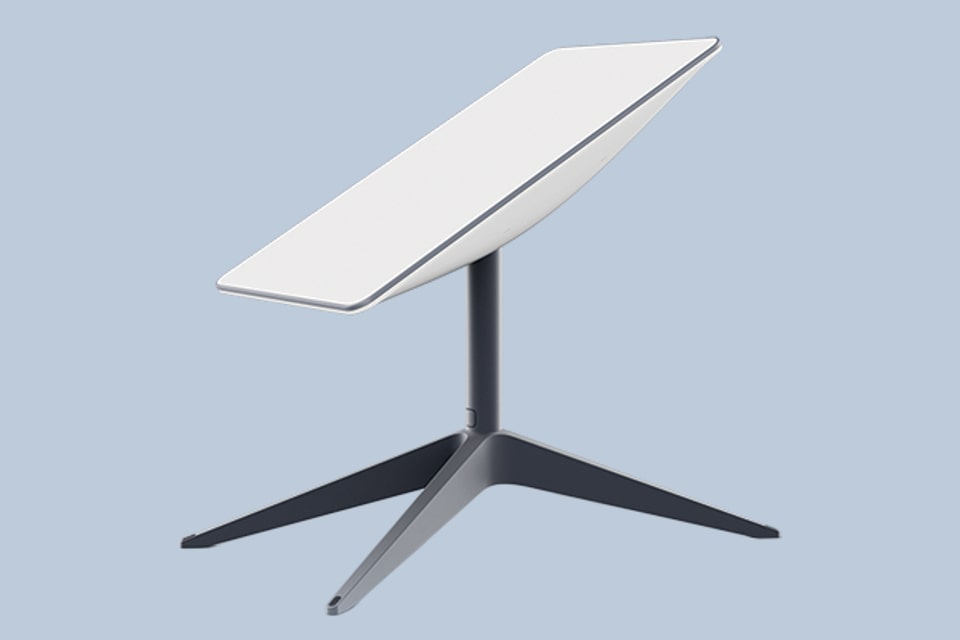
The Starlink Gen 2 dish, dubbed the "Standard Actuated" dish, boasts waterproofing and an expanded temperature tolerance range, now functioning reliably between -22°F to +122°F, a significant improvement over the original's range of 32°F to +86°F. Rectangular in shape, it measures 19" x 12" with a mast width of 1.3". Remarkably lighter at approximately 7.9 lbs compared to its predecessor's weight of 16 lbs, the Gen 2 dish accommodates up to 3 simultaneous users. However, unlike its predecessor, it lacks an Ethernet port, requiring users to purchase a separate Ethernet adapter. Featuring a removable cable for potential replacement, it maintains the rotating antenna design of its predecessor, enabling automatic alignment with satellites. Starlink Business High Performance has dimensions and features similar to those of the standard Gen 2 unit.
Installing Starlink Gen 2 on Your Roof
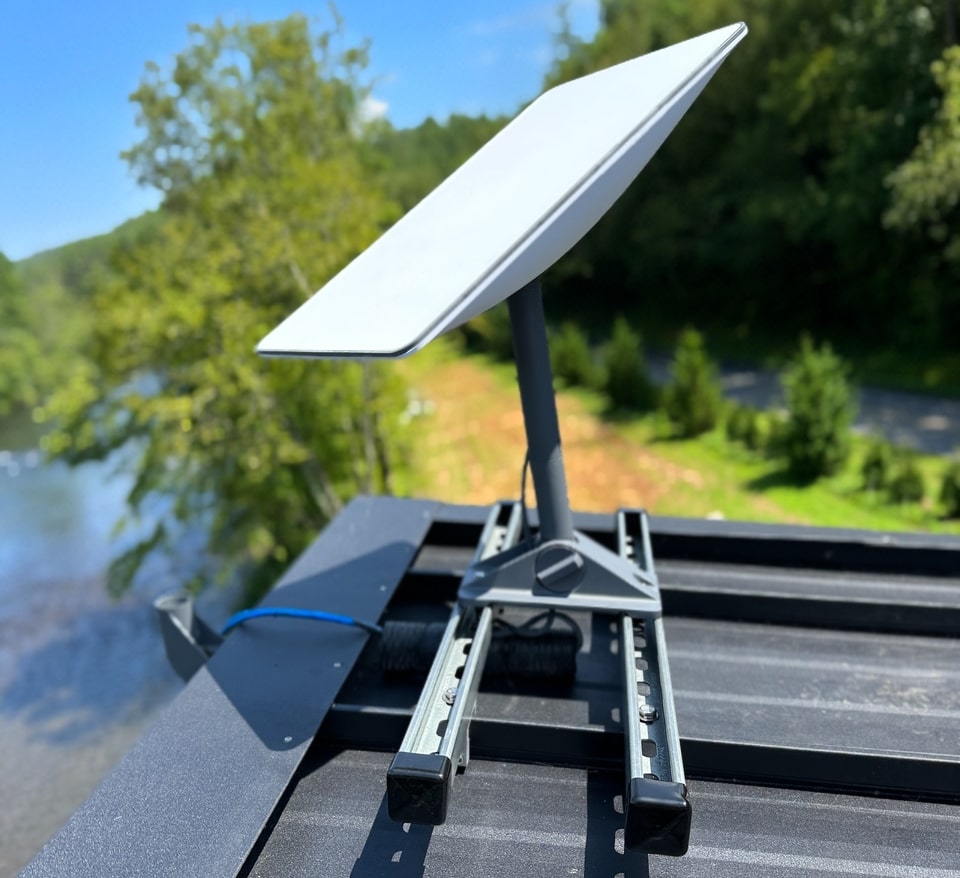
Before beginning the installation process for the Starlink Gen 2 on your roof, it's crucial to identify the specific type of roof panel you have. Are you dealing with a standing seam roof, or do you have an exposed fastener or screw-down panel? This distinction holds significant importance. For those with screw-down panels featuring visible fasteners, purchasing the SataMount MRM screw-down mounting kit is advisable. Conversely, if your roof is a standing seam design with concealed fasteners, opting for the SataMount RCT mounting kit is recommended. The Starlink Gen 2 original bracket is compatible with both of these models. This self-aligning, motorized dish will automatically adjust if it has an unobstructed northern view of the sky. Because the stock mounting bracket is a quadripod design with four feet, two mounting points will be attached to the upper strut. The contractor or building owner will install the other two attachment points on the lower strut.
The preferred method of attachment is to use the optional pivot mount. The mast included with the dish will slide right into the pivot mount for easy installation and adjustability. The Pivot Mount has four holes for attachment and mounts directly to the upper and lower struts of the SataMount. The technician will use two fasteners in each strut to secure the device.
Starlink Gen 3: The Latest and Greatest
The Starlink Gen 3 dish is the latest offering from Starlink, replacing the previous Gen 2 actuated dish as the standard option for new customers. The Gen 3 dish is thinner and more durable than earlier models, with an IP67 water and dust resistance rating. However, it has a higher power consumption of 75–100W than the 50–75W for the Gen 2 dish. The Gen 3 dish also has an updated router that supports Wi-Fi 6 and has two Ethernet ports. The Gen 3 dish promises better performance than previous models. However, Starlink has yet to confirm if it will provide higher internet speeds. Some early users have reported that the Gen 3 dish can maintain a connection even when not perfectly aligned. However, performance may suffer if it's not aimed correctly.
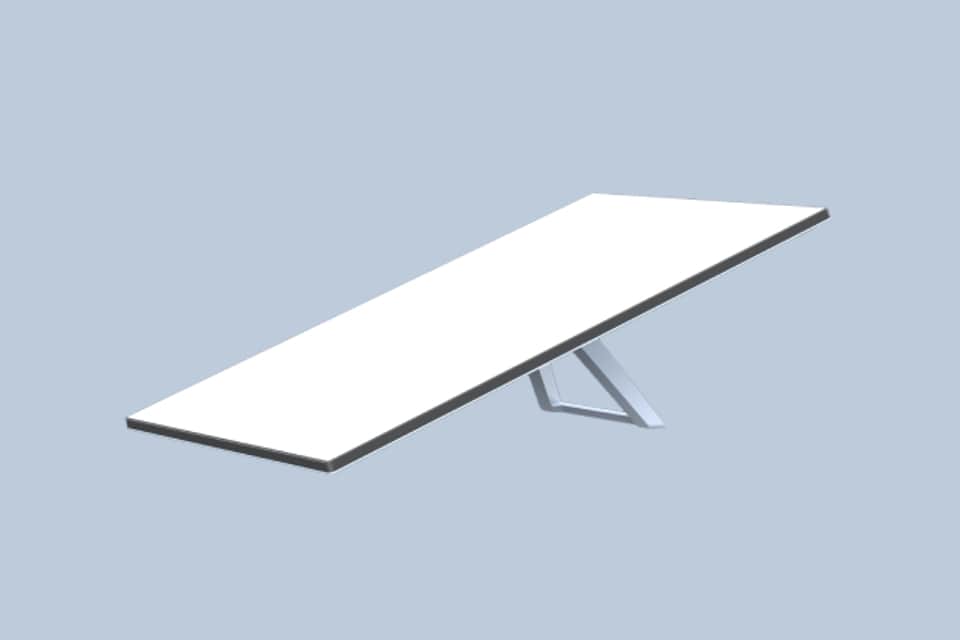
The Starlink Gen 3 dish is 19 x 12 inches, weighs approximately 9 lbs, and has a higher power consumption than the previous Gen 2 model. Despite its bulkier build, it offers enhanced durability, as evidenced by its IP67 rating. Unlike the fixed cable length of the Gen 2, the Gen 3 comes with a 50 ft cable, with an option for a 150 ft variant. Operating within temperatures ranging from -22°F to +122°F (-30°C to +50°C), it provides versatility across various climates. Moreover, the Gen 3 dish features a broader 110-degree field of view, facilitating more accessible access to unobstructed sky views than the 100-degree field of view on the Gen 2 model. Unlike its predecessor's automatic motorized alignment, the Gen 3 requires manual alignment utilizing the Starlink app.
Installing Starlink Gen 3 on Your Roof
Before installing the Starlink Gen 3 on your roof, you must identify your roof panel type. If you have a standing seam roof with concealed fasteners, use the SataMount RCT mounting kit. We recommend the SataMount MRM screw-down mounting kit for a screw-down panel with exposed fasteners. Regardless of the roof type, the Starlink Gen 3 kickstand bracket is incompatible with any roof mounting kit. The Starlink Gen 3 also does not come equipped with a mast from the factory, like the Gen 2 previously did. The preferred attachment method is the optional Gen 3 Pivot Mount, Mast, and Mast Adapter Kit. The Gen 3 Pivot Mount kit is available from the Starlink shop on their website. Having your username and password to access the shopping part of the website would be helpful. When you receive your pivot mount kit, snap the kickstand out and slide the mast adapter into the slot. Next, attach the mast or pole to the mast adapter and attach it to the pivot mount. You can attach the pivot mount once you install the SataMount on the roof.
Starlink High Performance for Mobile and Marine (Maritime)
Starlink designed the Flat High-Performance Kit for maritime, mobility, and energy use. Enabled by Starlink's low Earth orbit satellite network, the kit delivers high-speed, low-latency broadband internet at sea, with speeds up to 350 Mbps. It features a rugged design, a wide field of view, and enhanced GPS capabilities to ensure consistent connectivity while in motion. The Starlink engineering team optimized the hardware for permanent vehicle, boat, or roof installation. This dish design features more than double the antenna capacity of the standard Starlink dish, enabling faster speeds and higher throughput for users.
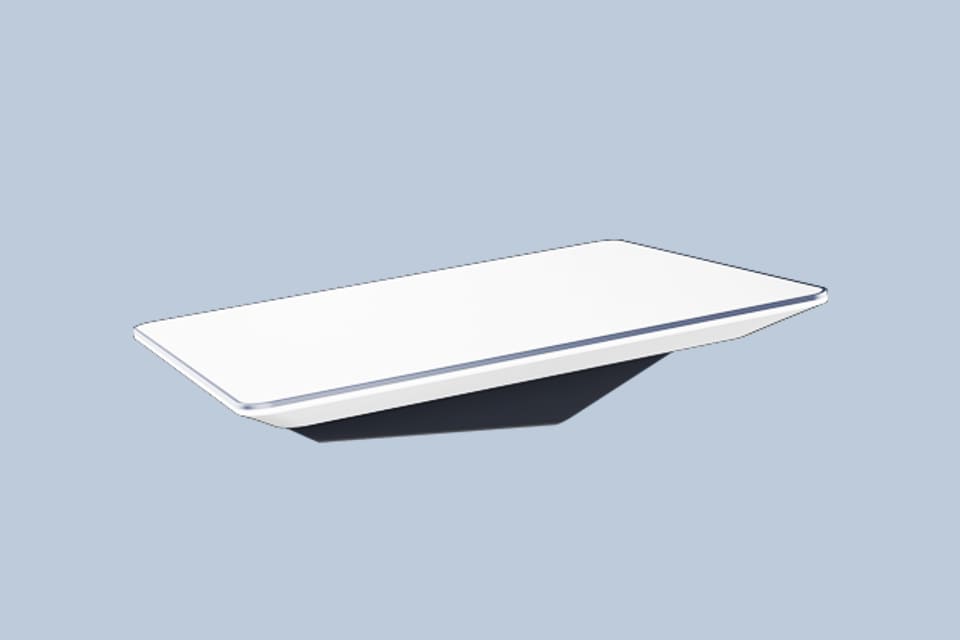
The High-Performance Kit is suitable for permanent installation. Still, users can also employ it in temporary or portable maritime applications. When used at sea, the kit may experience reduced coverage beyond 20–35 km from shore unless the user upgrades to an appropriate offshore service plan. The kit may initially draw more power when turned on in a new location. Still, power consumption can drop to 45–50W if not using much uplink. Operating within temperatures ranging from -30°C to +50°C (-22°F to +122°F), it provides versatility across various climates. The dish weighs approximately 13 lbs without the cable and approximately 15 lbs with the 26.2 ft cable.
Installing Starlink High-Performance Starlink High-Performance Model on Your Roof
Before installing the Starlink High-Performance Model on your roof, you must identify your roof panel type. If you have a standing seam roof with concealed fasteners, use the SataMount RCT mounting kit. We recommend using the SataMount MRM screw-down mounting kit with a screw-down panel with exposed fasteners.
Regardless of the roof type, you can only mount the Starlink High-Performance mounting bracket onto a flat surface. Starlink primarily intends to use this system on mobile homes, RVs, and boats. However, when you pair it with the Flat High-Performance Pipe Adapter and a Universal J-Mount Mast with a Roof Bracket, you can permanently install it on your roof using the SataMount. Please note that Starlink does not equip the High-Performance Model with a mast from the factory.
Conclusion
It is always essential to research before ordering any mounts or kits for your Starlink system, regardless of the generation you are utilizing. This blog aims to help you select the proper mounting kits and accessories needed for a correct Starlink installation on your screw-down or standing seam roof. Starlink is a constantly expanding brand, with new and exciting developments seemingly being announced weekly. We will continue following their progress and releasing new products to keep these systems compatible with our customers' roofs. The next time you look up at the night sky and see that long, dotted line, you can smile, knowing that each light represents accessibility for people across the globe. For product inquiries or orders, contact us at support@snojax.com or call 1-800-766-5291.

