Instructions
Snow Guard Installation Video:
In this video, you'll learn three ways to install SnoBlox-Snojax Snow Guards on metal roofs.
- By adhesive attachment using Surebond SB-190 adhesive,
- By mechanical attachment using #14 screws, and
- By 3m tape attachment.
Start by getting a free custom spacing layout from SpacingTool.com. If you haven't done so already, you'll need to measure your roof pitch, roof run, eave length, and panel measurements. Everything you need is at SpacingTool.com.
The following installation steps will vary depending on which method you use.
We'll begin with the adhesive attachment method. To get started, refer to your spacing layout and mark where each staggered row will be installed. We recommend using string lines to ensure that each row is straight. Next, clean the roof surface where each snow guard will be placed. Do not allow the cleaner to touch the snow guards. When the panel is fully dried, cut a wide nozzle opening in the tip of the Surebond SB-190 tube and puncture the inner seal. Generously apply the Surebond SB-190 adhesive to the entire base of the snow guard. Make sure there's an adequate squeeze out around the perimeter when the guard is firmly pressed onto the panel. When straddling a minor rib with the interchangeable base of the Snojax II or IceJax models, the entire gap must be filled in order to ensure a weather-tight seal. Place the face of the snow guard toward the ridge of the roof and press down firmly to ensure complete adhesion. Check the squeeze-out for gaps, and while wearing a rubber glove, finger wipe to fill any voids to ensure a weather-tight seal. Proceed to the next guard according to your spacing layout from SpacingTool.com. On steeper pitched roofs, use string lines to hold the snow guards in place and to prevent them from sliding until the adhesive sets up, usually in 24 hours.
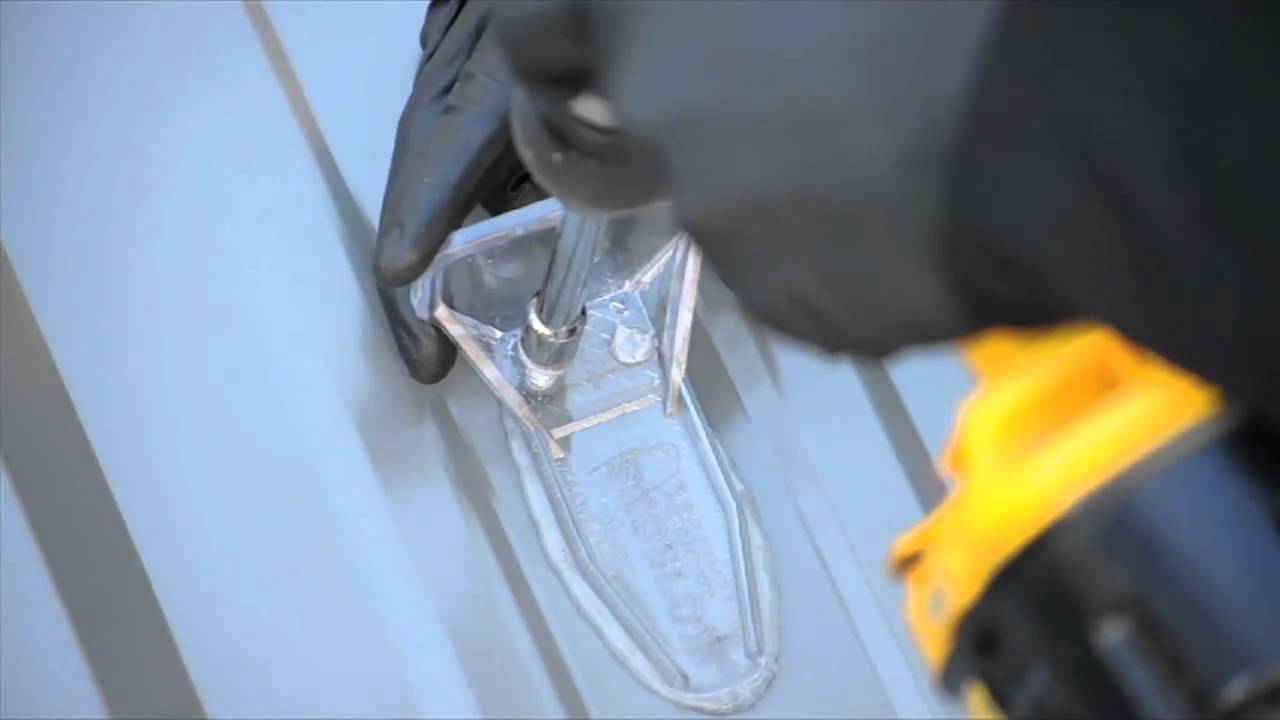
The second method for installing snow guards is by mechanical attachment. Start by referring to your spacing layout. Next, clean the roof surface where each snow guard will be placed. Do not allow the cleaner to touch the snow guards. Mark where each staggered row will be installed. When the panel is fully dried, cut a wide nozzle opening in the tip of the sealant tube and puncture the inner seal. Depending on the type of screw used, some installers prefer to pre-drill starter points. Generously apply the sealant to the entire base of the snow guard. Make sure there's an adequate squeeze out around the perimeter when the guard is firmly pressed onto the panel. When straddling a minor rib with the interchangeable base of the Snojax II or Icejax models, fill the entire gap to ensure a weather-tight seal. If you are installing metal snow catcher snow guards, apply sealant generously to the bottom unless an EPDM sealer pad is already affixed to the guard. Place the face of the snow guard toward the roof ridge. Use a neoprene washer and #14 screw to penetrate through the guard and into a purlin, structural support, or at least 2-inch-thick wood blocking underneath. Tighten each screw enough to compress the neoprene washer without over-tightening or deforming the gasket. Check squeeze out for gaps, and while wearing a rubber glove, finger wipe to fill any voids to ensure a weather-tight seal. Then proceed to the next guard according to the spacing layout.
The third method of attachment used only with snow breaker snow guards is with 3m tape. Refer to the recommended spacing layout at SnowBreaker.com and mark where each row will be installed. Clean the roof surface where each snow guard will be placed. Do not allow the cleaner to touch the SnowBreaker or 3M tape. When the panel is fully dried, peel the red plastic backing from the pre-adhered 3M tape on the base of the SnowBreaker. Place the forward cutting edge toward the ridge of the roof. Press down and hold firmly for 10 seconds to ensure complete adhesion. Cut a narrow nozzle opening in the tip of the Surebond SB-190 tube and puncture the inner seal. Apply an adequate bead of adhesive around the entire base of the SnowBreaker to ensure a weather-tight seal. Proceed to the next guard according to the spacing layout. We hope this video has been informative. If you have any questions, please call us at 1-800-SNOJAX-1 or visit us at Snojax.com.
Thank you for using SnoBlox-Snojax snow guards.
Snow Rail Installation Video:
Downloadable Product Installation Instructions:
Please refer to the Spacing Guidelines Pages for proper snow guard placement. Always consult an architect or engineer for exact spacing recommendations for your project.
These installation guidelines are provided as assistance to installers with commercial and residential sites. www.SnoBlox-Snojax.com takes no responsibility for errors or omissions and cannot be held responsible for product installation.
Snow Guards (Glue Down/Screw Down)
3M SnowBreakers
Slate Guard (Shingle Guard)
Standing Seam Snow Rails
Screw-Down Snow Rails
VentSaver HD
VentSaver EZ
VentSaver Extreme
VentSaver SS/SD Plates
LeafBlox
RoofClamp RC/RCT
SnoCleat RC/RCT
SnoCleat PBR
SnoCleat 2.67
SataMount™ (Standing Seam)
SataMount™ (Screw Down)
Snow Guard and Snow Rail Install Frequently Asked Questions (FAQs)
Contractors, roofers, and homeowners can all use our intuitive, user-friendly spacing guidelines pages. If you know the pitch of your roof, the distance between your roof panel's seams, your ground snow load, and the type of system that you desire, then the hardest part is already completed. Spacing guidelines are available for all of our products. These charts are only designed for snow loads up to 45 psf. If you have a project in an area that receives snow loads of higher than 45 psf, please fill out the SnoBar Price Quote Form.
NO! No matter what system you choose, isolated installations are never advised. Prior to buying snow guards, you should review our spacing guideline pages. Isolating snow guards on a roof will causes a disproportionate snow loading that extends well beyond the secluded area of guards. One of the most important factors to take into account when building a system for your project is the weight distribution of roof snow and ice across the whole roof area. The potential failure of isolated installations could result in harm to the roof's panels and structure. To ensure proper placement for snow retention, it is advisable to speak with an architect or engineer before placing an order.
DIY-savvy homeowners make up a large portion of our clientele. Installation instructions are delivered with your order and are also available on our website. Working safely on a metal roof with a sloping surface is the riskiest part of installing snow guards. Before beginning an installation and ascending to your roof, please make sure you are using suitable fall protection, such as the RidgePro. If you decide to employ a professional, any certified general or roofing contractor should be able to install these guards for you.
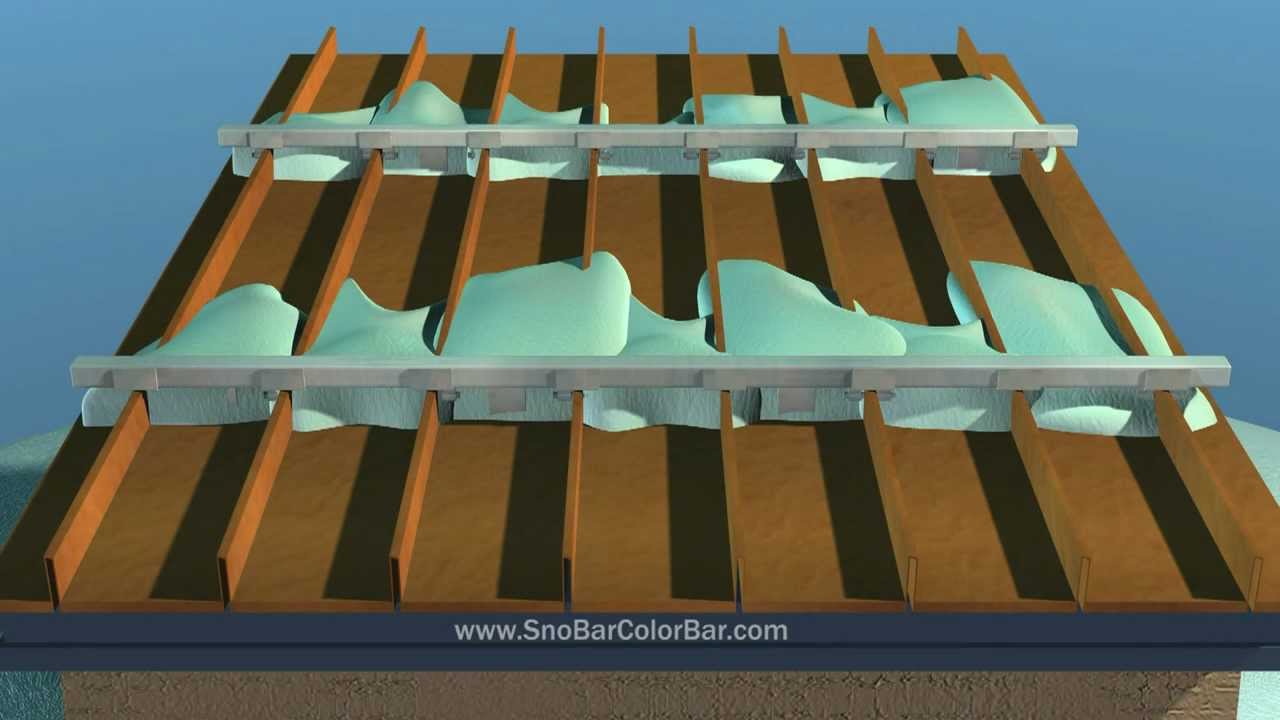
Pad-style snow guards are small, individual units that are produced from polycarbonate or metal. These guards can be mounted mechanically or with adhesive (ONLY when using polycarbonate styles). A snow rail system consists of 6' or 12' long metal bars that are attached to your roof using clamps (for use with standing seam roofing) or brackets (for use with screw down roofing). A bar system normally requires fewer rows but is generally more expensive. Regardless of the system you choose, we never advise installation in isolated areas like above doorways, roof vents, chimneys, or HVAC systems. A proper layout will cover the entire length of the roof and will likely require several rows up the slope for equal weight distribution.
Screw-down installation can normally be done year-round using either the 1.5” Master Driller screws or the 2” Master Gripper screws and the NovaFlex MR150 sealant. Installation with the Surebond SB-190 adhesive must be given approximately 28 days at 50 degrees (fahrenheit) or above to achieve a full cure. In both cases, it's recommended to install your snow retention system before the winter season to ensure it is in place before the first snowfall.